How to create labels
Label Configuration Tab
-
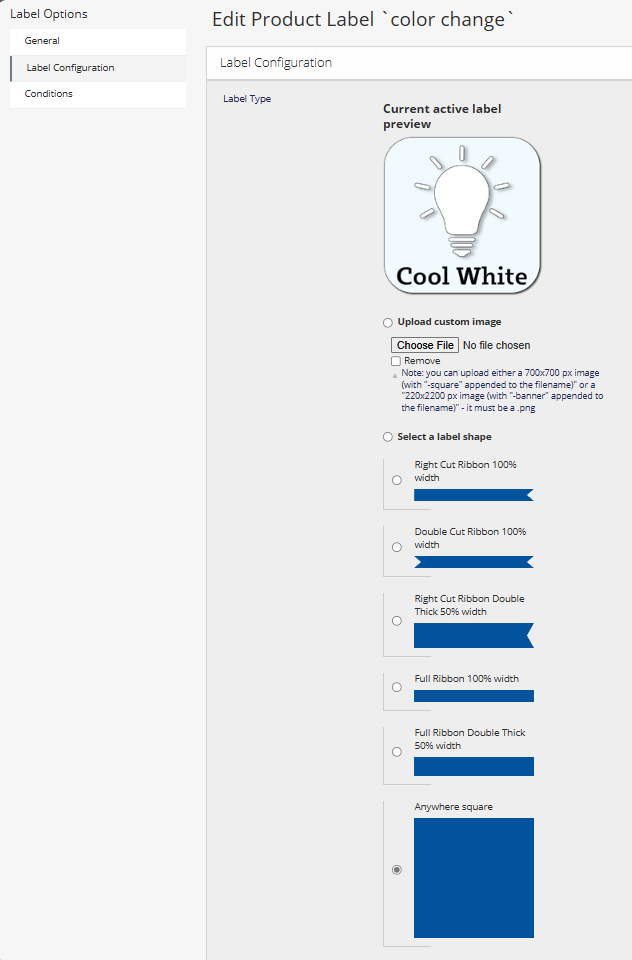
Current active label preview shows the active label without the text. This will not update until you press save for the label you are creating.
-
Upload custom image radio button to select if you need to create a label with an image. The image file must be a .png file. If you are switching from one image to another image, you must select "remove" and save, then come back and upload a new image. If you are switching from image to shape, you do not need to remove the image. Simply select the Select a label shape radio button and choose your shape below, fill in the rest, then press save.
- uploaded images need to be either 640x640 pixels for
-squareor 2150x215 pixels for-banner. - before uploading your image please append
-squareor-bannerto the file name based on the dimensions. For images 640px by 640px use-squareand for images 2150px by 215px use-banner.
- Select a label shape radio button to select if you need to create a label with a shape. Select the shape you would like to use then fill in the rest of the information and press save.
-
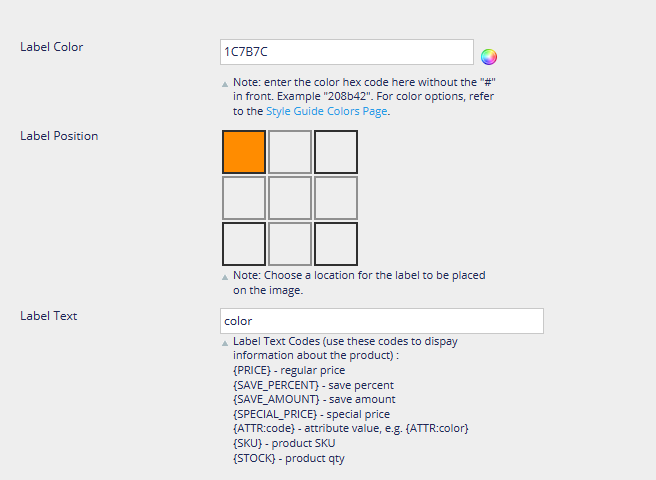
Label Color input is where you enter the hex code for the color you would like to use for the label. Please see Label Colors for more information on how to use this input.
-
Label Position input is where you choose the position of the label on the product image. You can choose any space for any label. The labels with
100%will span the entire width and10%in height of the product image. The labels with50%will span half the width and10%in height of the product image. The anywhere square wil take up30%and30%in height on the product image.
-
Label Text input is where you enter the text you would like to display on the label. Text can be used with image uploads.
-
Character Limit per Label: the labels are designed in a way to add
...at the end of the text if it exceeds the character limit for the label space provided. You can't add to much and make it look bad. You can add to much and to make it not be visible to the customer.